Goals
In completing this assignment, you will learn how to:
- Share data between threads in a program
- Approach an “embarrassingly parallel” problem using threads
Collaboration
For assignments in CIT 5950, you will complete each of them on your own or solo. However, you may discuss high-level ideas with other students, but any viewing, sharing, copying, or dictating of code is forbidden. If you are worried about whether something violates academic integrity, please post on Ed or contact the instructor.
Contents
Setup
For this assignment, you need to setup a Linux C++ development environment. You can use the same environment as the one used in the previous assignment. The instructions are here if you need them: Enivronment setup
You can downlowd the starter files into your docker container by running the following command:
curl -o blurring.zip https://www.seas.upenn.edu/~cit5950/current/projects/code/blurring.zip
You can also download the files manually here if you would like: blurring.zip
From here, you need to extract the files by running
unzip blurring.zip
From here you can either open the project in Vim or VSCode.
For Vim, you just need to run
cd blurring
vim negative.cpp
For VSCode you will have to follow steps similar to what we did to open chcek_setup in the setup document.
Overview
You must use pthreads for this assignment. You are not allowed to use C++ threads.
In this assignment, you will implement a multithreaded solution to an “embarrassingly parallel” problem, i.e. one that can obviously be improved by doing parts of it concurrently.
Many image manipulation algorithms are “embarrassingly parallel” because they modify individual pixels or groups of pixels, and changes to one pixel can be made independently of changes to others.
As you may know, a bitmap (BMP) image is one in which the pixels of the image are arranged in a grid, and each pixel’s color is defined using a combination of red, green, and blue (RGB).
Here, you will implement a simple algorithm to make an image appear blurry by setting each pixel’s RGB color to the average of those around it.
The number of surrounding pixels to include in calculating the average is determined by the “box size” (this approach to blurring is known as a “box blur”), using an x-y coordinate system.
In the example below, we want to blur the pixel at coordinate (x, y). If the box size is 1, we consider all pixels in the square with (x-1, y-1) in the upper left corner and (x+1, y+1) in the lower right corner. If the box size is 2, we consider the square defined by (x-2, y-2) and (x+2, y+2).
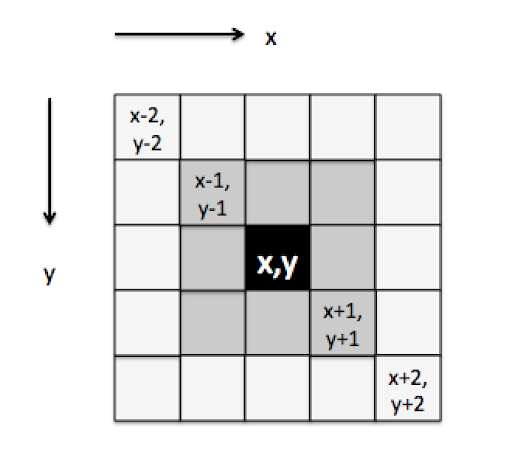
In general, the RGB color for the pixel at (x, y) should be the average of the pixels in the square defined by (x-b, y-b) and (x+b, y+b), including the pixel itself, where b is the box size. However, if part of the box is outside the valid range of the image, you should only take the average of the pixels that are actually inside the image.
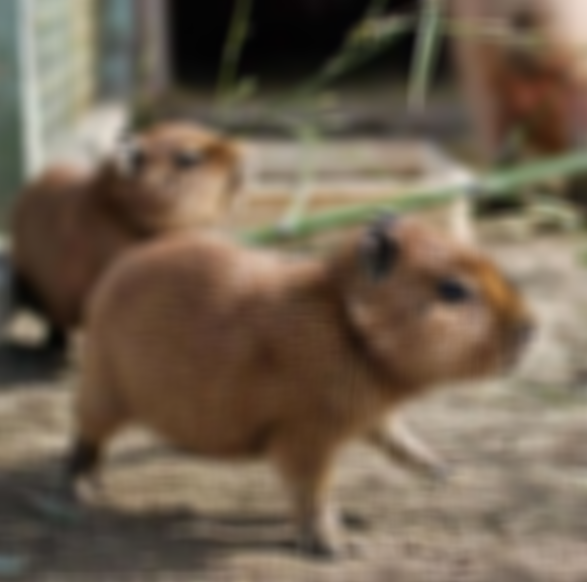
As an example, here’s a bitmap image that you can start with (it’s in test_files as capybara.bmp):

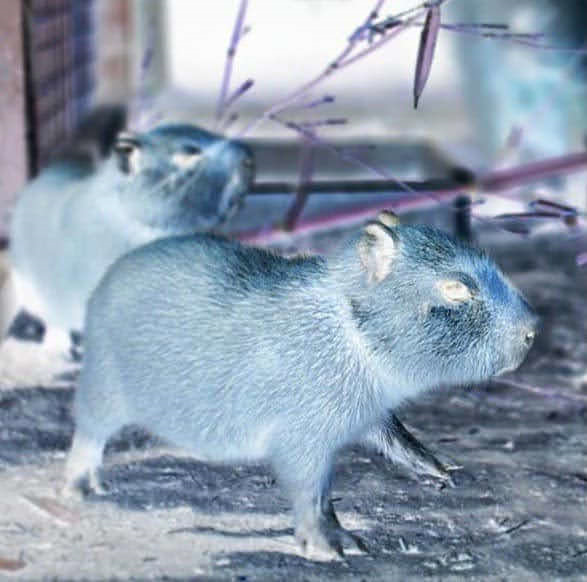
Here it is with a blur box of size 8:
And with a blur box of size 20:

(Much blurry. Wow. So fuzzy.)
Note that there are variations of the box blur algorithm that weigh the average based on how close the pixels are, or that make multiple blurring passes, but for simplicity, you only need to implement the algorithm as it is described above.
See the Instructions section below for details on the code files and how you should write some programs to do this
Instructions
Step 0
We will use the “Quick & Dirty BMP Library” (QDBMP) for working with the bitmap images.
The qdbmp.hpp, qdbmp.cpp, cqdbmp.h and cqdbmp.c, files provided in the zip are all you need for this assignment, but more information about this library is available at http://qdbmp.sourceforge.net
To get you started, we have provided a program called negative.cpp that uses the QDBMP library to read a bitmap image and produce its negative by subtracting each pixel’s R, G, and B values from 255 (the maximum value for each).
Make sure you are able to compile this program using the Makefile we have provided (by running “make negative” in the terminal), and that you can run it. The first argument to the program is the name of the bitmap file to be modified, and the second is the name of the file to be created.
For instance, if you run
$ ./negative ./test_files/capybara.bmp negative.bmp
using the capybara.bmp file provided, the output file, negative.bmp, should look like this:
(Wow. So inverted. Much scary. Wow.)
You will have to open the images outside of the docker container to view them. It should be safe to view the file with docker open, just be sure to close it once you are done.
There is nothing to submit for this step but be sure you are able to compile, run, and understand the program before proceeding.
Step 1
Before you attempt to write a multithreaded version of the blurring program, make sure you’re able to do it sequentially first.
Copy negative.cpp to a file called blur_sequential.cpp and modify the code so that it implements the box blur algorithm as described above, using a box size that is specified as a command-line argument.
If the box size is 0 or negative, display an error message and terminate the program.
You should be able to run your code after it is compiled by running:
$ ./blur_sequential <input_file> <output_file> <block_size>
for example:
$ ./blur_sequential capybara.bmp capybara_blur_8.bmp 8
Hint: make sure your algorithm uses the original RGB values of the pixels and not the modified values. That is, if you are calculating the new values of a pixel, and you’ve already blurred the pixels above it and to its left, you need to make sure your calculations use the original RGB values of those pixels, and not the blurred ones.
Depending on the size of the bitmap, you may need a box size of at least 8-10 to be able to see that your program is working.
Step 2
Now copy blur_sequential.cpp to blur_parallel.cpp in which you implement the box blur algorithm using multiple threads.
The number of threads should be specified as a command-line argument, after the box size. If the number of threads is 0 or negative, display an error message and terminate the program.
Each of the N threads should concurrently process approximately 1/N of the pixels. How you approach this is up to you, but be careful that no pixel is being processed by more than one thread. We WILL be checking your code manually after the due date to make sure each thread is doing roughly 1/N of the work. We are not expecting it to be divided perfectly since the number of pixels may not divide evenly into the number of threads.
Hint: Don’t forget to “join” on all the threads before writing the modified bitmap to a new file.
Your program should still produce the same output as in Step 1, but presumably, be faster (especially for large box sizes) if the threads are truly running in parallel. However, depending on the computing power of your computer, the performance gain may not be obvious/repeatable.
The autograder does evaluate your program based on performance gain so you can use that as a metric to see if your code is tryly run in parallel.
You should be able to run your code after it is compiled by running:
$ ./blur_parallel <input_file> <output_file> <block_size> <thread_count>
for example:
$ ./blur_parallel capybara.bmp capybara_blur_8.bmp 8 4
Make sure you run Helgrind to look for race conditions in your program, and use mutex locks in order to make the program thread safe if it is needed, but still taking advantage of concurrency.
See the Helgrind section below for more details.
Suggested Approach
Below we have provided a suggested approach to this homework. Note that you are not required to follow this ordering if you believe another approach would work better for you. Also note that you can gradually check your progress, and run specific tests.
-
Compile, run and read
negative.cpp. Make sure it works and that you understand what is going on in that program. -
Copy
negative.cppintoblur_sequential.cpp. From here, modify the code so that it takes in more command line args and blurs the image based on those args. -
Implement
blur_parallel.cpp. You can start from yourblur_sequential.cppcode and modify the code so that it takes in more command line args and splits the work across threads. This may work for you, but you may find it useful to write the program from scratch.
Hints
Here are a few hints and tips that you may find useful when approaching this homework.
-
Don’t wait until the end to test. As mentioned in the suggested approach above, you can create “empty” definitions for functions, just enough to compile, so that you can test your other functions.
-
For
blur_sequential.cppandblur_parallel.cppmake sure your algorithm uses the original RGB values of the pixels and not the modified values. That is, if you are calculating the new values of a pixel, and you’ve already blurred the pixels above it and to its left, you need to make sure your calculations use the original RGB values of those pixels, and not the blurred ones. -
For
blur_parallel.cppyou may find you need to specify more than one value to the thread you create. As a result, you may want to create a struct and pass that to a thread, which is done in the lecture exampletotal_locking_better.cpp. -
For
blur_parallel.cpp, don’t forget to “join” on all the threads before writing the modified bitmap to a new file.
Grading and Testing
Compilation
We have supplied you with a Makefile that can be used for compiling your code into an executable.
You may need to resolve any compiler warnings and compiler errors that show up. Once all compiler errors have been resolved, if you ls in the terminal, you should be able to see various executable listed.
One of which is called blur_parallel and the other blur_sequential.
How to run these executables is described below.
Note that your submission will be partially evaluated on the number of compiler warnings. You should eliminate ALL compiler warnings in your code.
Valgrind
We will also test your submission on whether there are any memory errors or memory leaks. We will be using valgrind to do this. To do this, you should try running:
valgrind --leak-check=full ./blur_sequential capybara.bmp capybara_blur_8.bmp 8
and
valgrind --leak-check=full ./blur_parallel capybara.bmp capybara_blur_8.bmp 8 4
Note that for blur_sequential and blur_parallel, you can run those programs under different command line args.
If everything is correct, you should see the following towards the bottom of the output:
 ==1620== All heap blocks were freed -- no leaks are possible
 ==1620==
 ==1620== For counts of detected and suppressed errors, rerun with: -v
 ==1620== ERROR SUMMARY: 0 errors from 0 contexts (suppressed: 0 from 0)
If you do not see something similar to the above in your output, valgrind will have printed out details about where the errors and memory leaks occurred.
Helgrind
We will also test your submission on whether there are any thread errors.
We will be using the tool helgrind to do this, which is a tool under valgrind
To do this, you should try running something like:
valgrind --tool=helgrind ./blur_parallel capybara.bmp capybara_blur_8.bmp 8 4
If everything is correct, you should see the following towards the bottom of the output:
==14004== For counts of detected and suppressed errors, rerun with: -v
==14004== Use --history-level=approx or =none to gain increased speed, at
==14004== the cost of reduced accuracy of conflicting-access information
==14004== ERROR SUMMARY: 0 errors from 0 contexts (suppressed: 216 from 42)
Your output may look slightly different, but the most important thing here is that it says 0 errors from 0 contexts.
Testing
To test your blur programs (both sequential and parallel), you should run your program on the capybara.bmp and duck.bmp files provided in the test_files directory with either 8 or 20 as the block size.
We have provided what the expected output in the test_files directory to compare against.
To compare your bmp output with the provided ones, you can make use of the provided program compare_bmp.cc.
Run the program with your output image and the appropriate example image to see how the images compare.
For example:
./compare_bmp my_blurred.bmp ./test_files/capybara_blur_20.bmp
will compare your output with the expected output of blurring capybara.bmp with bocksize equal to 20.
You should see Incorrect pixels is 0 in the output if your code output the correct image.
Submission:
Please submit your completed blur_sequential.cpp, and blur_parallel.cpp to Gradescope
Note: In addition to the autograder, we will be manually reviewing the submissions for this homework assignment to ensure that you are using threads and that you are using them as described in the write-up. Just because you get full points on the test suite does not mean that you will get full points after we review your submissions manually.
Note: It is expected to take a while for this to run.