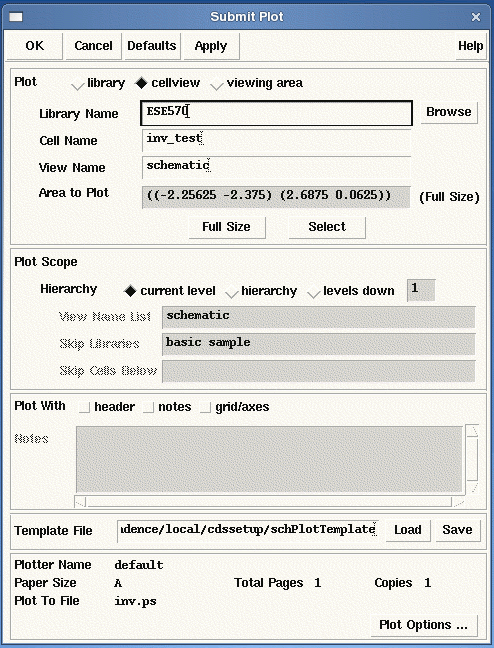
Now that the schematic is complete, you'll want to print it out. To do this, left click Editing:Design->Plot->Submit... The submit plot window should appear.

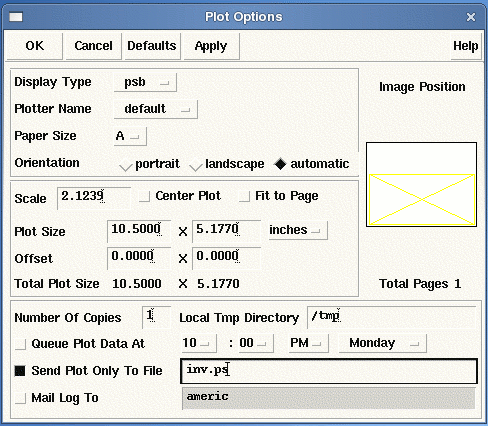
Left click Submit Plot: Plot Options. The Plot Options subwindow appears.

The default destination for the plot file will be your Cadence root folder. If you want the Postscript files to show up in your home directory, you can put "~/" in front of the filename.
Check the "Send Plot Only To File" and type in a descriptive name about the plot. Be sure to end the name with the ".ps" extension, as seen above. Also, ensure that the "Header" button is NOT selected in the "Submit Plot" window. The header option will produce an extra page with general information of your plot such as the name of the plot, size and etc. Left click OK in the "Plot Options" window and also in the "Submit Plot" window. What you are plotting is a postscript file. When the machine is done creating the file, it will send you mail telling you that it completed successfully. To prevent this, you can uncheck "Mail Log To". You can now use the print tool to plot your schematic.
Using postscript to generate schematics for projects and homework assignments is highly recommended, since it will produce black and white schematics that are easily printed. The alternative, screen captures from Cadence, is difficult to read in print due to the thin lines and dark background.
Note: You can modify your postscript file by using the GIMP program installed on Linux machines. This is only one way to do it, there are other different ways to modify .ps files.
 |
||
| previous | top | next |