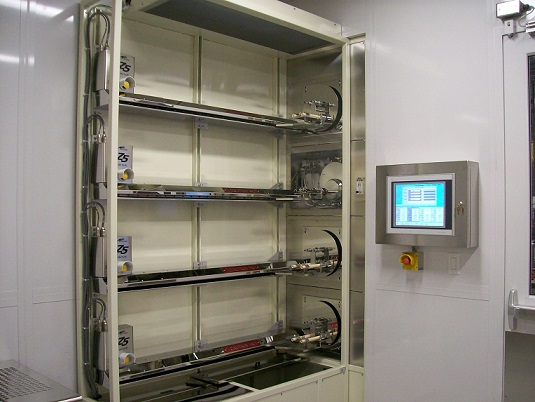
Updated on 9/10/2018

1 RCA cleaning
1-1 Apron, Faceshield, RCA bench cleaned gloves
1-2 Turn on the heater of the bath
1-3 Clean and rinse wafer(s) in the cassette
1-4 Dry the wafer(s) using spin rinse dryer
1-5 Place the cassette in the box
2 Process in Furnace
2-1 Check-in
2-2 Log in
2-3 Load the sample
2-4 Run recipe
2-5 Unload the sample
2-6 Log out
2-7 Check out
3 Supplemental Documents
Note: Users must follow the ensuing protocols to use the furnace. Some wafer(s) MUST be cleaned thoroughly in the RCA cleaning bench before loading them into the furnace.
1. RCA bench
Any metals are not allowed in RCA bench.
The following wafers are allowed in RCA bench.
silicon, silicon dioxide, silicon nitride, fused silica, quartz
2. Tube 1: Oxidation
3. Tube 2: LPCVD Nitride
4. Tube 3: Clean Anneal
5. Tube 4: General Anneal
Note:
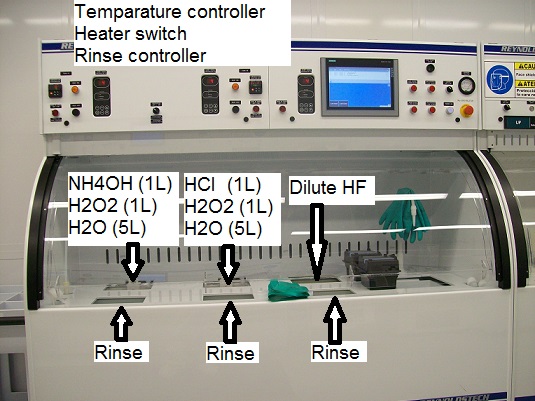
You must wear apron, faceshield, RCA bench cleaned gloves for the safety reason.
1. Turn on the heaters of the cleaning tank #1 and #2.
2. Wait until the bath temperature reaches to 70 °C.
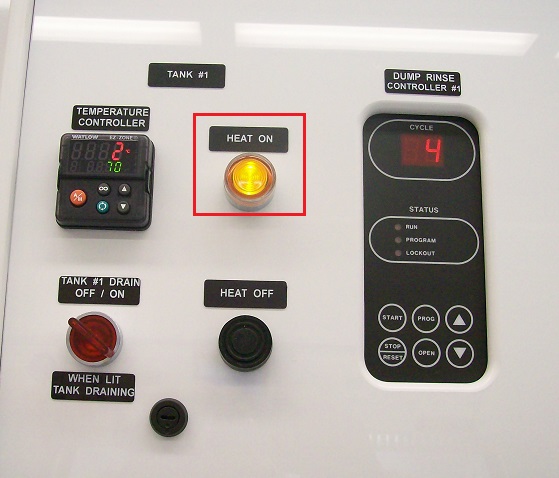
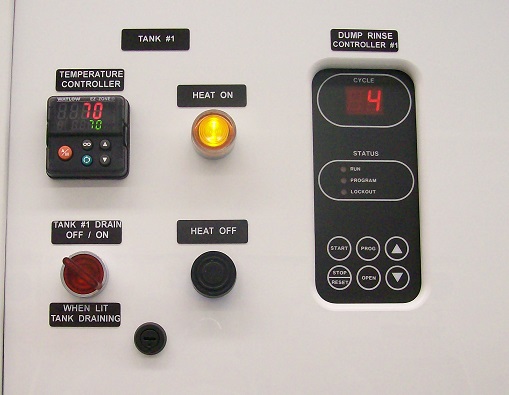
1. Open a black carrier box, and you will find a cassette for wafers.
2. Place wafer(s) in the cassette.
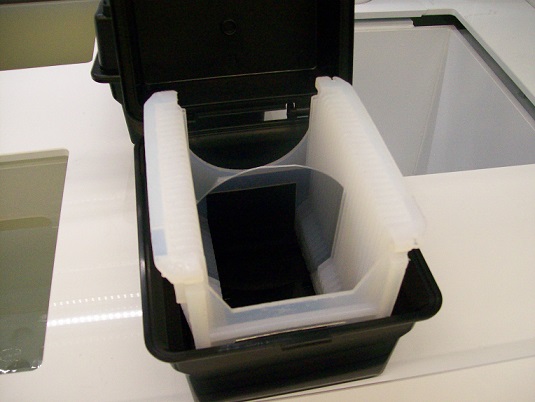
3. Soak the cassette in the cleaning tank #1 using a cassette holder.
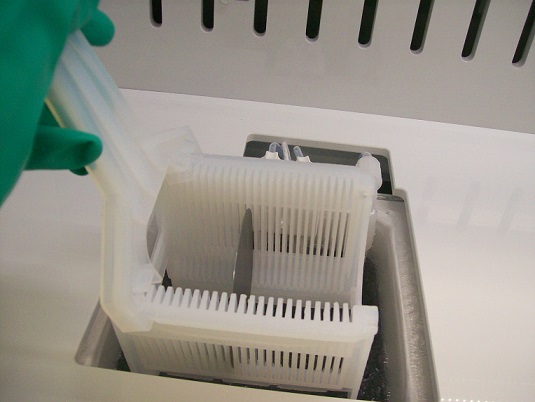
4. Leave the cassette in the cleaning tank #1 for 10 min.
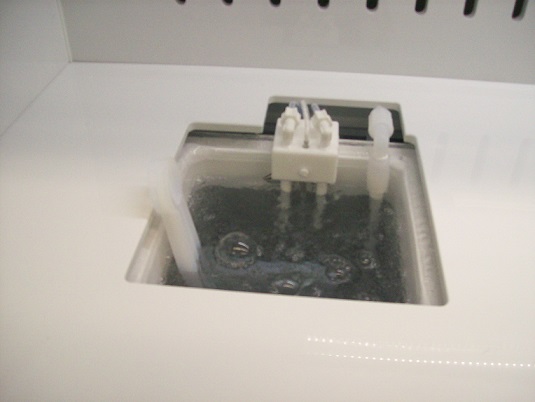
5.Move the cassette into the rinsing tank #1.
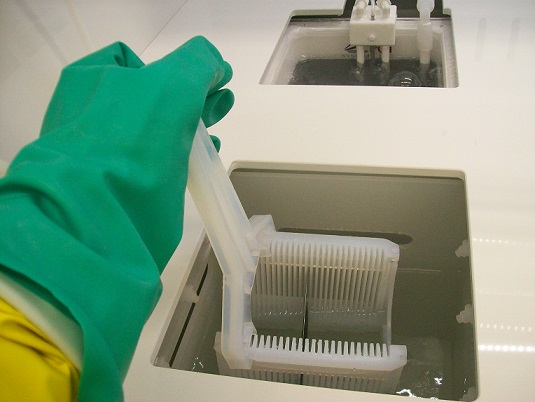
6. Press the "START" button for the rinsing program.
7. When the program is completed, beeping sounds.
8. Press the "STOP" button.
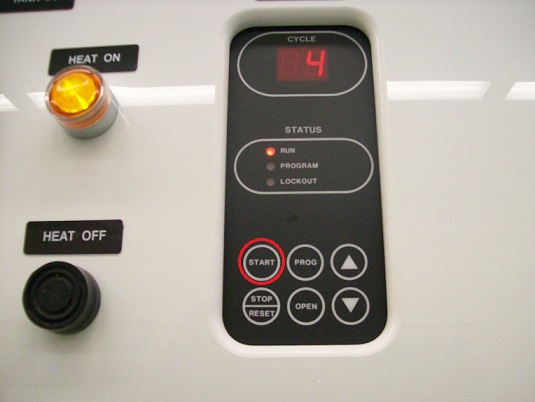
9. You MUST repeat the same procedure for the cleaning tank #2 and the rinsing tank #2 as above.
Note: The cleaning tank #3 is optional. However, if you use the cleaning tank #3, the wafer(s) must be rinsed.
1. Open the door of spin rinse dryer.
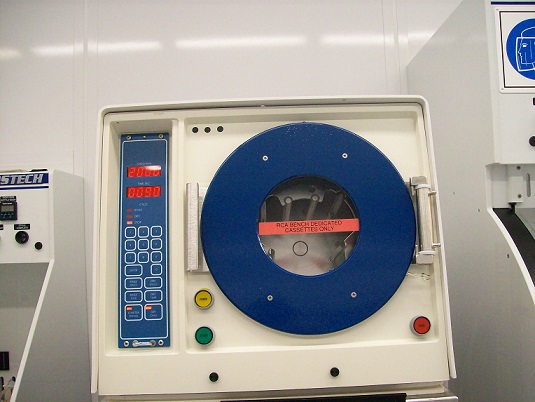
2. Insert the cassette with the wafer(s).
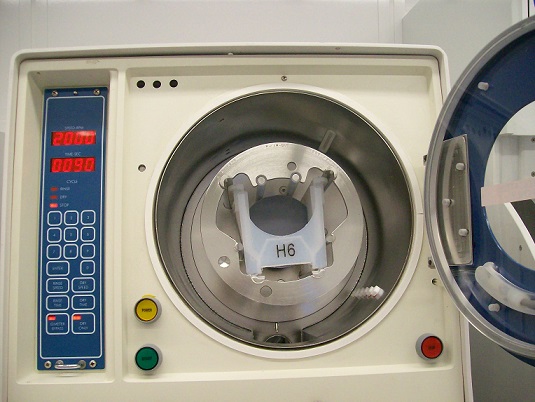
3. Close the door.
4. Press the "START" button, and the spin rinse drying process starts.
5. When the LED of "STOP" is turned on, press the STOP" button.
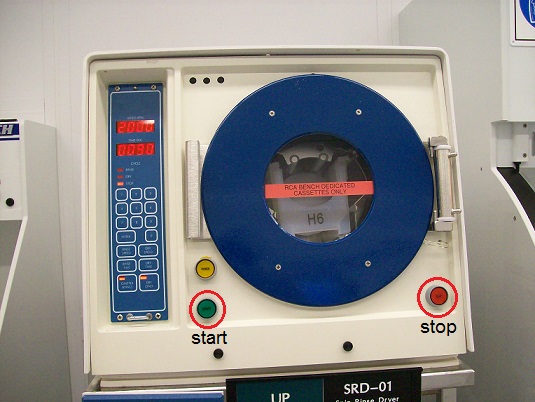
1. Place the cassette with the wafer(s) in the black carrying box.
2. Close the lid of the box.

1. Log-in on the ISIS scheduler.
1. Touch the screen if the screen is in blank.
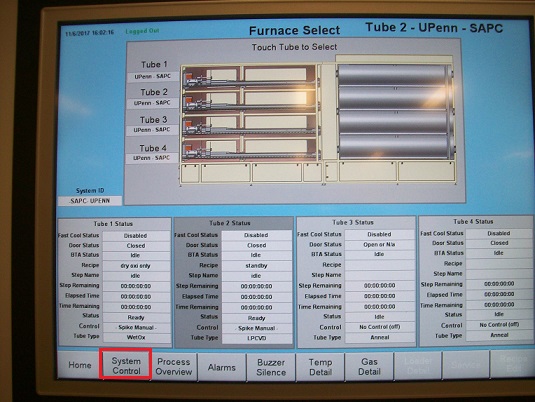
2. The following screen appears.
3. Touch the "System Control" button.
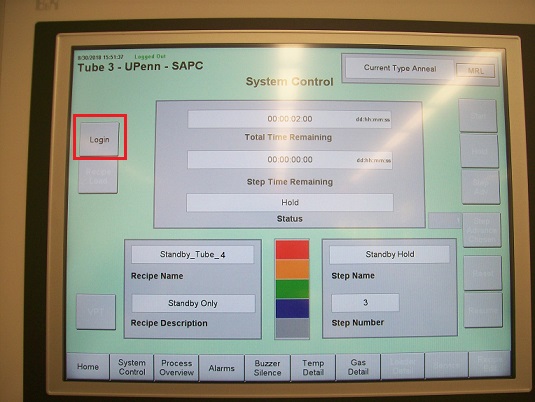
3. The following screen appears.
4. Touch the "Login" button.
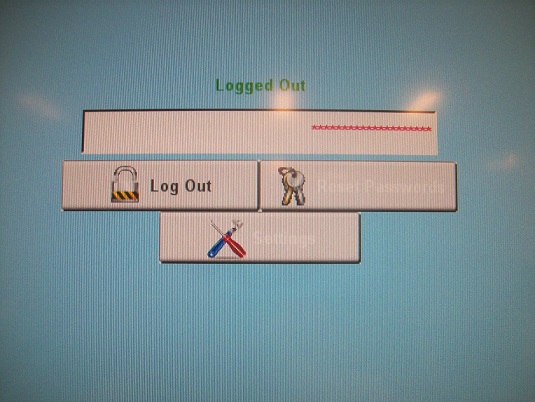
5. The following screen appears.
6. Touch the blank space area above the "Log Out" button.
7. The key board appears.
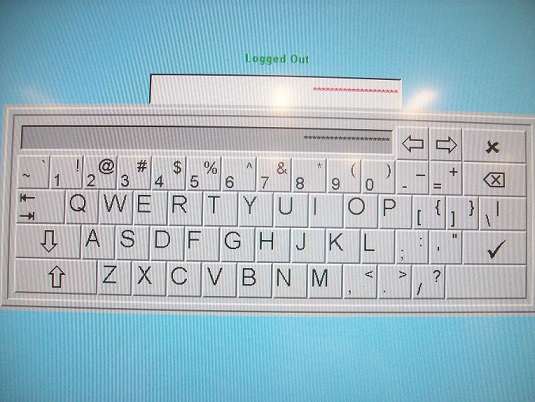
8. Type in "operator".
9. The following screen shows up.
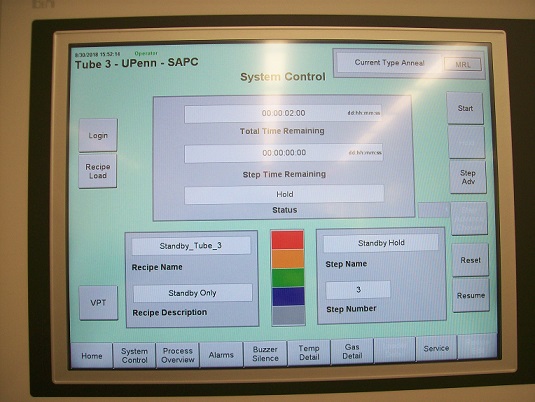
1. Touch the "Home" button, and the home screen appears.
2. Touch the tube status box or the tube which you want to use, and the back color of the box will turn into the gray.
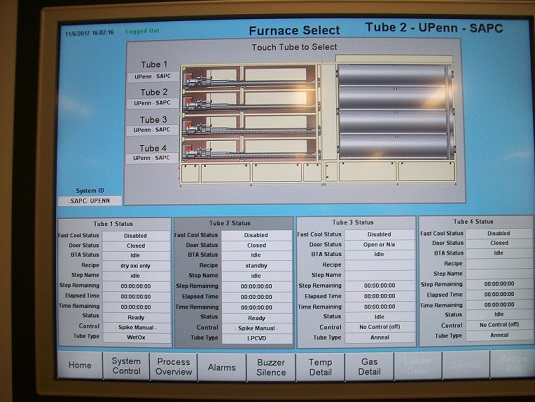
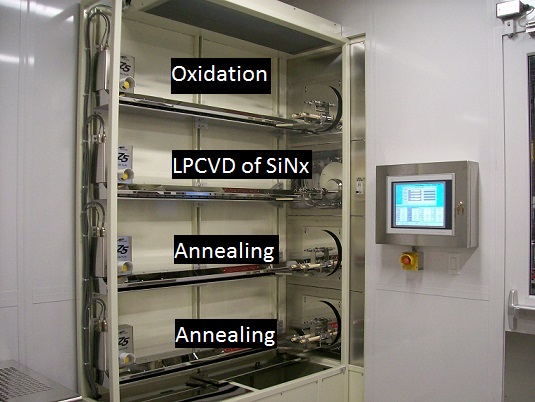
Note:
Tube 1. Oxidation
Tube 2. LPCVD of silicon nitride
Tube 3. Annealing
Tube 4. Annealing.
3. Touch the "System Control" button, and the "System Control" screen appears.
4. Press the "Step Adv" button to complete Stanby_Tube recipe.
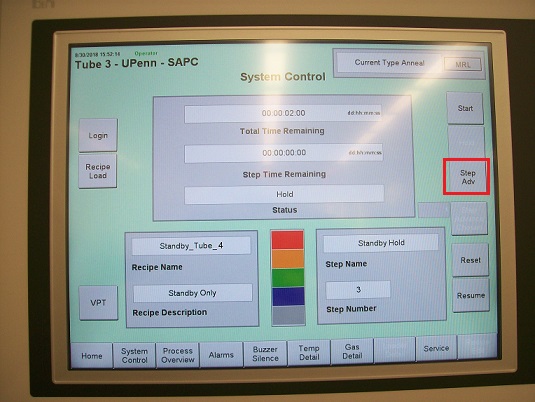
5. Make sure that the recipe is completed.
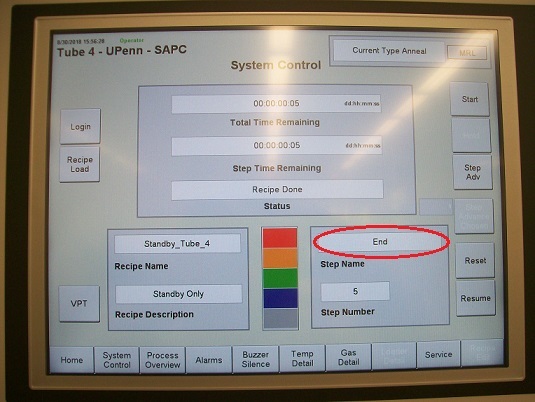
6. The tube is opened, and it is ready to load the sample(s).
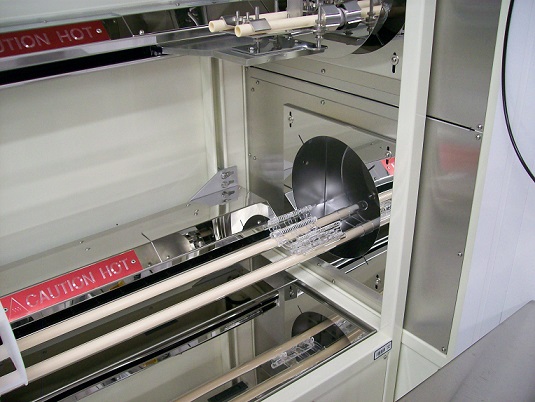
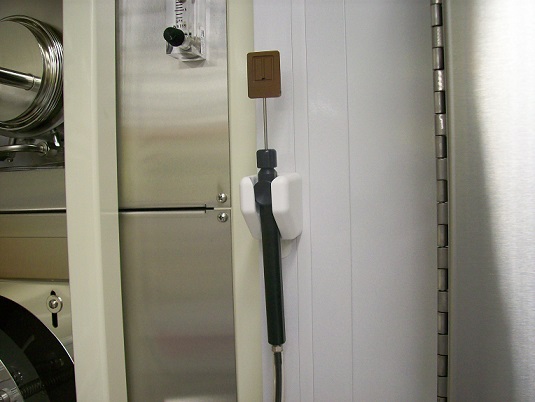
7. Take the wafer(s) out of the black carrying box, using vacuum tweezers.
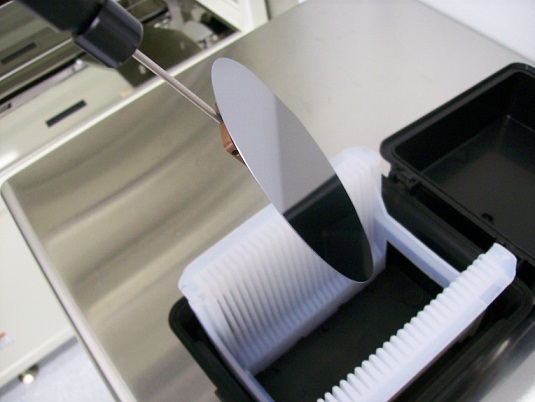
8. Load your wafer(s) in the cassettes in the tube.
Note:
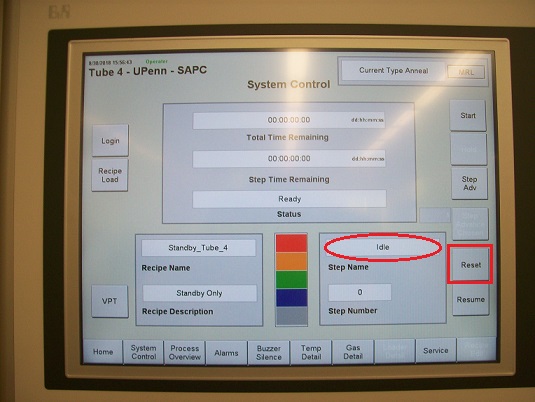
1. Touch the "Reset" button, and the step name will be "idle".
2. Before loading the recipe, touch the "VPT" buton, and the the following window appears.
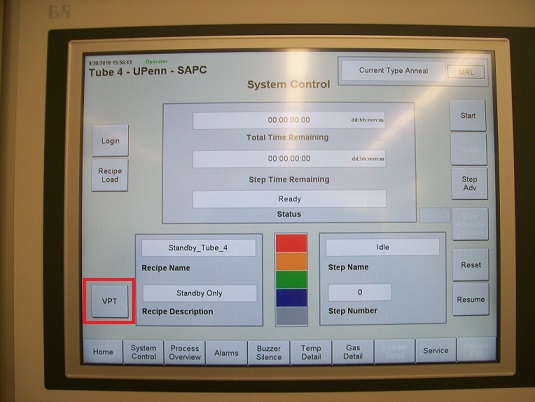
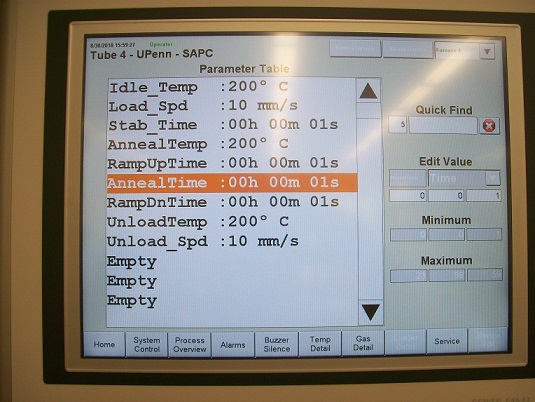
3. Change the parameters for Tube, if necessary.
4. Touch the "System Control" button.
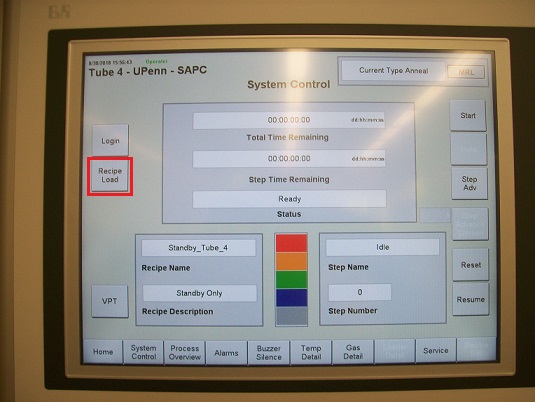
5. Touch the "Recipe Load" button.
6. The following window appears.
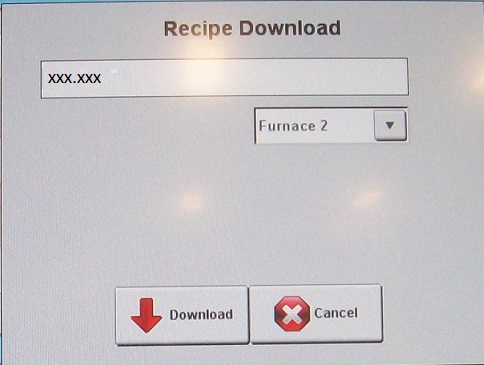
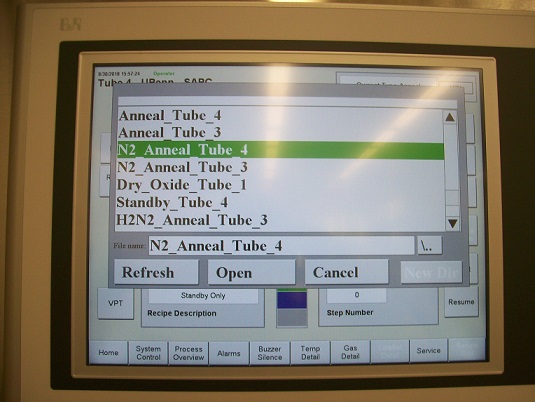
7. Touch the recipe name area, and the following window appears.
8. Select the recipe for the tube chosen above, and touch the "Open" button.
Available recipes:
Tube 1:
Tube 2:
Tube 3:
Tube 4:
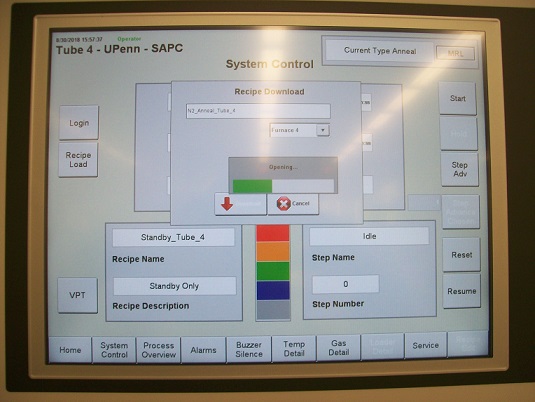
9. Touch the "Confirm" button in the pop-up window.
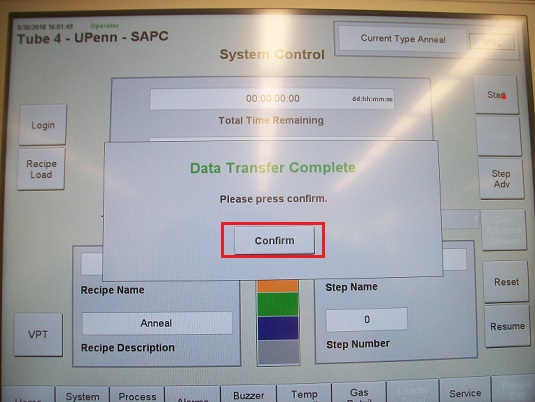
10. Make sure that the recipe name is the recipe chosen.
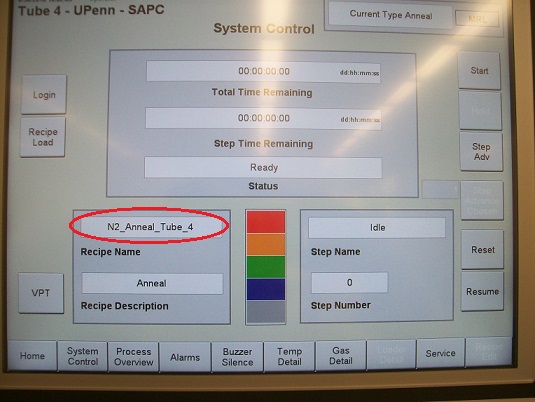
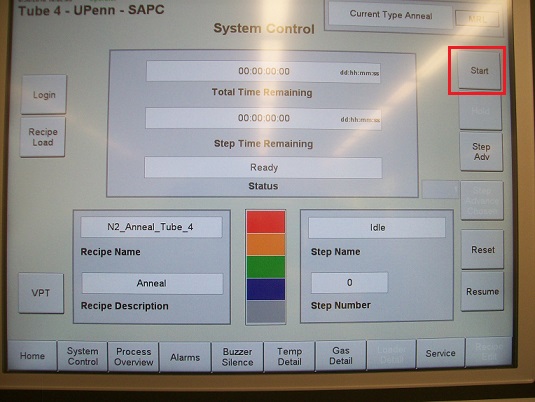
11. Touch the "Start" button, and the recipe will start.
1. The wafer(s) will be unloaded automatically when the process completes.
2. Remove your wafer(s) from the cassette.
3. Download the "Standby-Tube X" recipe for the tube chosen above.
4. Start the recipe, and the furnace is closed automatically.
1. Touch the "Login" button in the "System Control" screen.
2. Touch the "Log Out" button.
1. Log out in the IRIS scheduler.