MA6 Top-Side Alignment
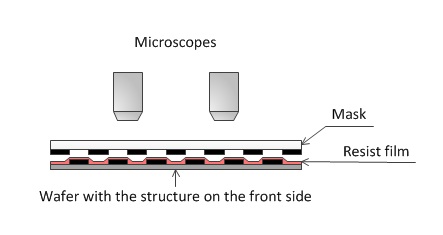
6.2.1 Adjust Location, Focus and Illumination
1. TSA microscopes will move down automatically when clicking the "Mask Holder NOT Clamped" button .
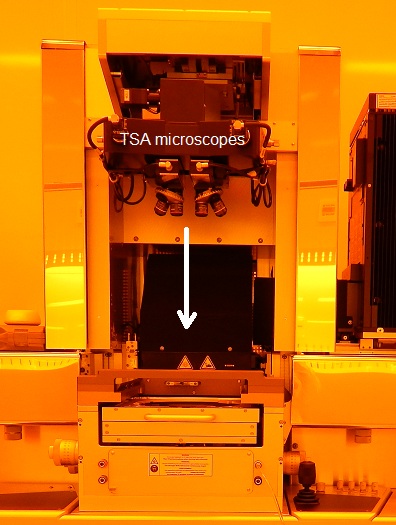
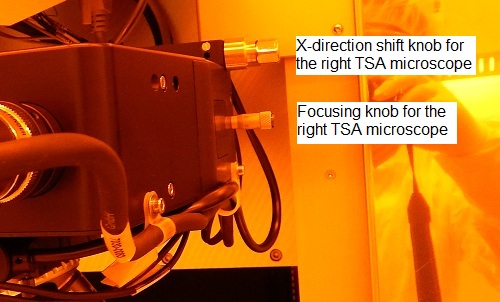
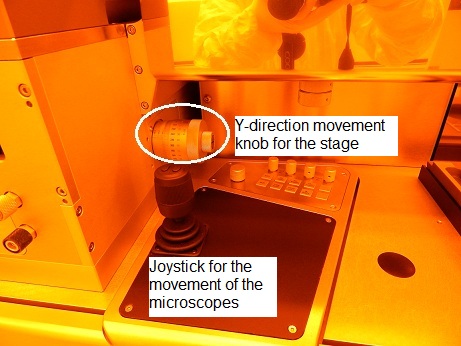
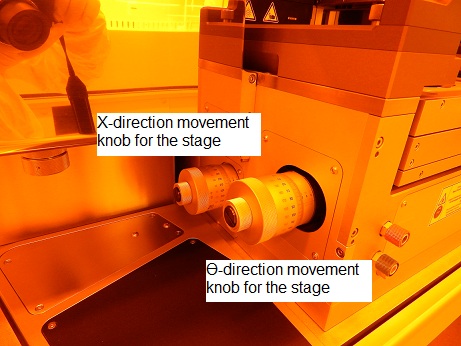
2. Find the alignment marks using the following knobs for the TSA microscopes.
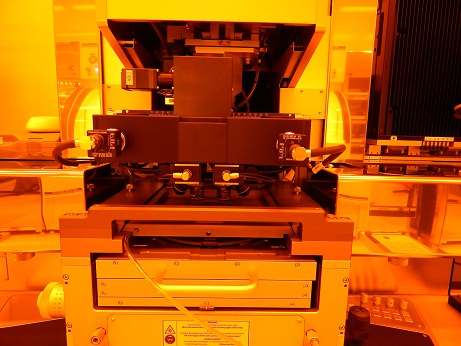
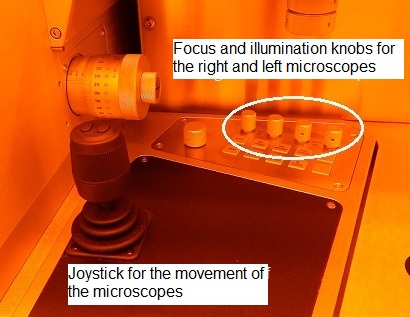
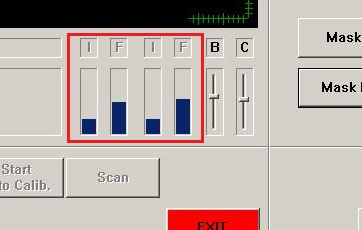
3. Adjust focus and illumination on the mask using the following knobs and indicators.
- Independent x-direction shift and focusing knobs for the right and left TSA microscopes.
- A joystick and focus and illumination knobs for the right and left TSA microscopes.
- The detail of these controls is shown in MA6 Recipes.
- Focus and illumination indicators in the window.
6.2.2 Load Sample
1. Load the sample chuck and sample, as shown in Non-Alignment.
2. Click the "Next" button to turn on wafer vacuum.
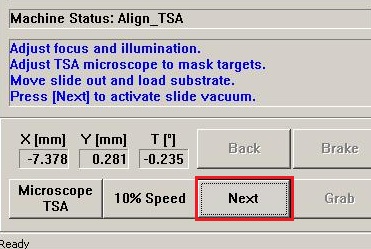
3. Move the transport with the sample slide in.
4. Click the "Next" button.
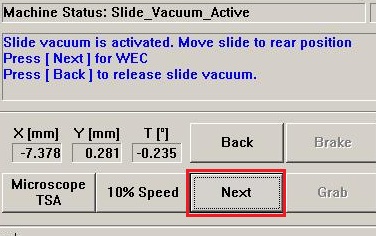
5. The following window appears.
- Note:
- If this window keeps being shown, the stage position is deviated too much from the position appropriate for the WEC contact, as a result of the alignment.
- If you click the "Close" button, then the WEC contact is stopped, resulting in the bad contact.
- In the alignment procedure, the vacuum contact should avoid this issue.

6.2.3 Alignment
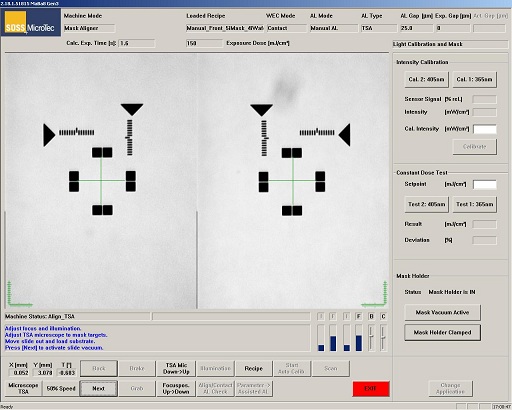
1. The following window appears.
2. Find and focus on the image of alignment marks of the sample (wafer).
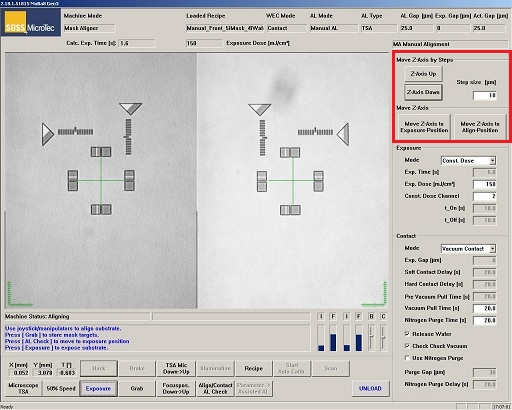
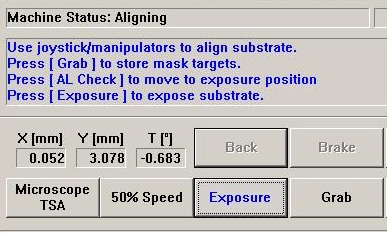
3. Make an alignment between the mask and sample (wafer) images, using the joystick and manipulators.
- Joystick and manipulators
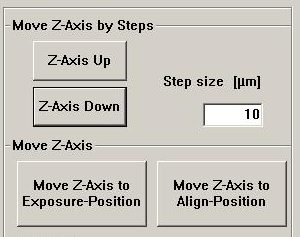
- The alignment (AL) gap is automatically set to be 25 μm, according to the recipe set up.
- If you are not comfortable with the AL gap, then move the Z-axis using the "Move Z-Axis by Steps" box on the right side of the window.
- You can check displacement upon the contact between the mask and sample, using the "Move Z-Axis box".
4. In the manual TSA alignment process, ignore the following messages in the window:
- Press [Grab] to store mask targets
- Press [AL Check] to move to exposure position
5. Go to the Exposure section below.