Transmittance Measurements
Updated on 1/05/2015
Note:
- Minimize the ambient lighting as much as possible. Turn off room lights, and reduce the intensity of any computer screens.
- The tool will measure air as the background and a film on glass as the sample. So, the glass should be transparent in the spectral range measured (a cheap glass shows an optical absorption in the UV range).
Contents
1 R&T Data dialog box
2 Taking the background spectrum
3 Taking the sample spectrum
4 Stand-by
1. R&T Data dialog box
1. Make sure there is no sample on the stage.
2. Select "R&T Data" from the "Acquire data" menu in the Hardware menu.

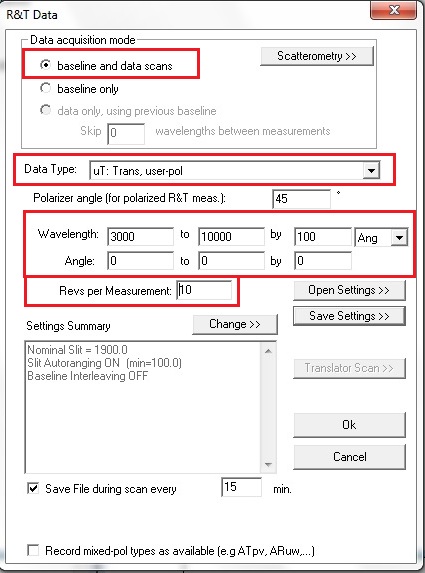
3. R&T Data dialog box appears.
- Select baseline and data scans
- Enter wavelength range (in this case, from 300 to 1000 nm).
- Set the initial and final angles of incidence to zero, with non-zero increment.
- Set revs per measurement to be 10-20.
- Select a T data type (in this case, uT and pol. 45˚ T meas).
- Save the setting, if necessary.

3. Click "OK".
4. The file directory will be opened for saving the intensity transmittance data.
5. Input the data file name, and click "OK".
2. Taking the background spectrum
1. The following message dialog box appears.
2. Make sure that no sample is on the stage.
3. Click "OK".

4. The sample and detector stages will automatically move to 90˚ and 180˚ positions, respectively.
- Make sure that the light beam to the detector is not blocked by anything.
5. The tool will start taking the background spectrum.

3. Taking the sample spectrum
1. After taking the background spectrum, the following message dialog box appears.

2. Mount the sample on the stage.
3. Click "OK".
4. The sample stage will automatically move to 0˚ position.
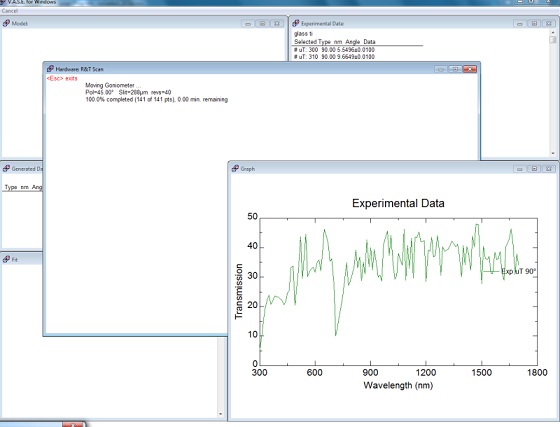
5. The tool will start taking the sample spectrum.

4. Stand-by
1. Open the "angle of incidence" dialog box (Hardware > Move > angle of incidence).
2. Enter new angle to be 70 degree in the "Change Angle of Incidence" dialog box, and Click "OK".
3. The sample and detector stages will automatically move to 70˚ and 140˚ positions, respectively.


