Thermal Imprint
Updated on 10/7/2014
Contents
1 Load Sample
2 Thermal Imprinting
3 Shut Down
1. Load Sample
- Note:
- To imprint alignment samples, please refer to "Imprint Alignment".
- Two plastic thin films are needed to do an imprint.

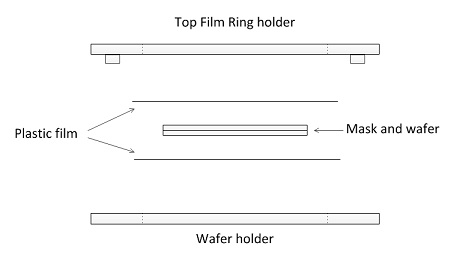
1. Place the smaller diameter thin film on the wafer holder.
- Make sure that the film covers the large inner hole and extends to the outside edge of the first ring.
- The film must be flat with no wrinkles.
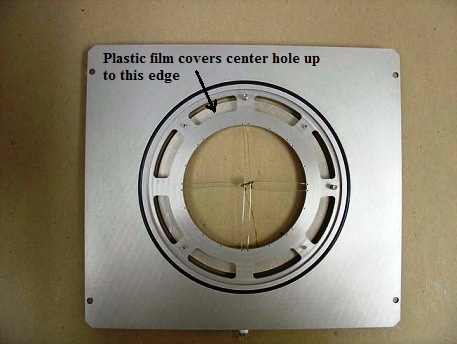
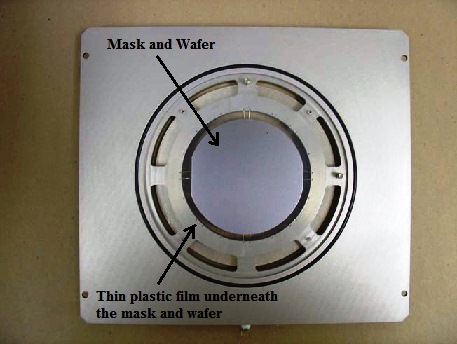
2. Place the mask and wafer in the center of the wafer holder.
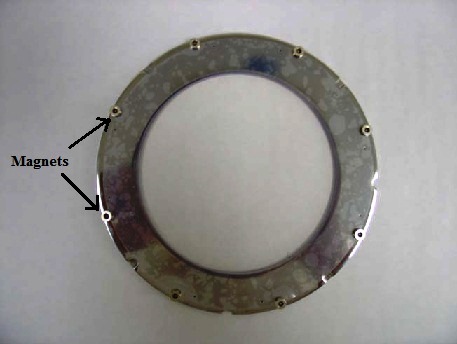
3. Place the larger diameter thin film on the Top Film Ring holder.
- The film is held in place by eight magnets.
- The magnets must be placed over cone point protrusion.
- The film needs to be flat with no wrinkles.
4. Flip the Top Film Ring Holder and place it onto the wafer holder.
- Align the cut out notches on the holder with the guide pins on the wafer chuck.
- The magnet side of the holder faces down.

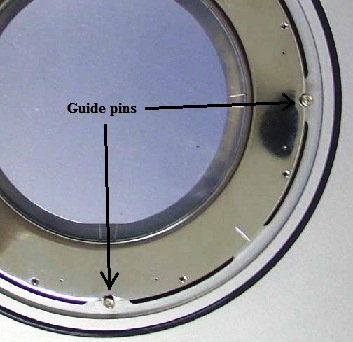
5. Gently push the drawer into the chamber until there is an audible “click”.
2. Thermal Impriting
1. Double click on the NX2600 Nanoimprint icon on the computer screen.

2. The following starting screen shows up.
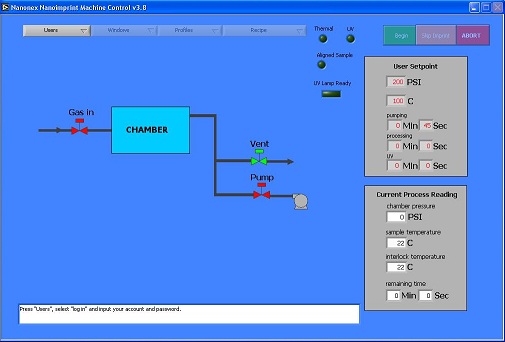
3. Click “Users” on the left top of the screen to open a drop-down menu.
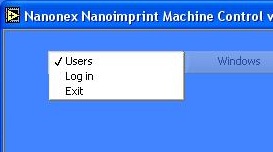
4. Choose “Log in”, so that the login dialog box shows up.
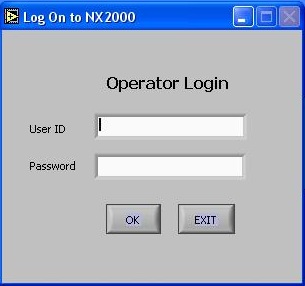
5. Enter ID and Password, and click “OK”.
- If for some reason, you don’t want to log in, just click “EXIT” in the log in pop up menu. The program will terminate.
6. After log onto the system, you will see the following dialog box.
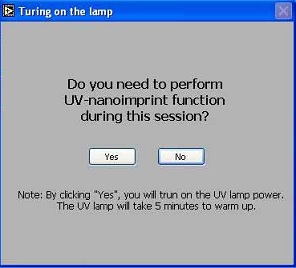
7. Click “No” if you will only perform thermal nanoimprint during the session.
8. Click "Recipe" on the middle top of the screen to open a drop-down menu.
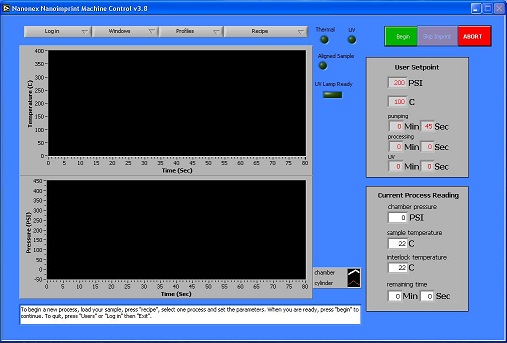
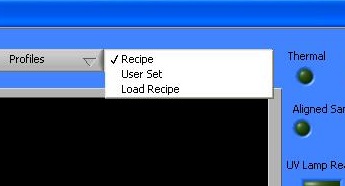
- Click "Recipe" to load the default imprinting recipes.
- Click "Load Recipe" to load the recipe saved.
- Click "User Set" to open the following Process Parameters window. Input the parameters in the Process Parameters window (see NX2600 recipes).
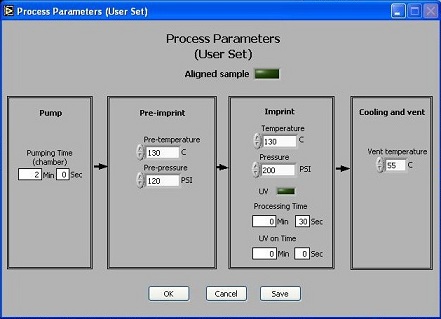
- Aligned Sample: switch it on if you want to imprint NX2600 aligned samples (refer to "Imprint Alignment")
- If UV on/off is switched to off, UV on time will be automatically set to 0 by software.
- The process will keep the sample at temperature and pressure for the duration of processing time.
- If both Pre-temperature and Temperature settings are less than 25°C, the thermal heaters will not be turned on during imprint process.
9. To save current recipe, press the "save" button and select a path.
10. To save current run file, click Profiles and Save after selecting a file path.
- Once the recipe is selected, the indicators will show whether the thermal heater and UV lamp will be on during current process
11. Click the green “Begin” button on the right top of the screen.
- After clicking the “Continue” button in the following pop-up menu, the chamber closes automatically and the vacuum pump starts to pump the chamber.
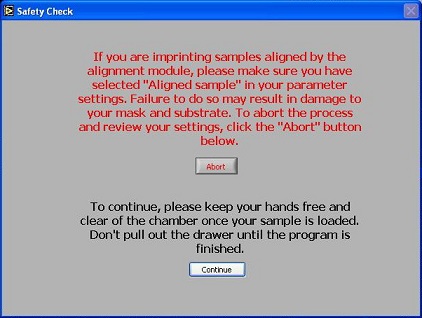
WARNING!!
From this point on DO NOT pull out the drawer until the program is finished and the chamber has stopped moving. When user-set pumping time expires, the imprinting process begins automatically. During the process, temperature and pressure inside the chamber are monitored in real-time and displayed on the monitor.
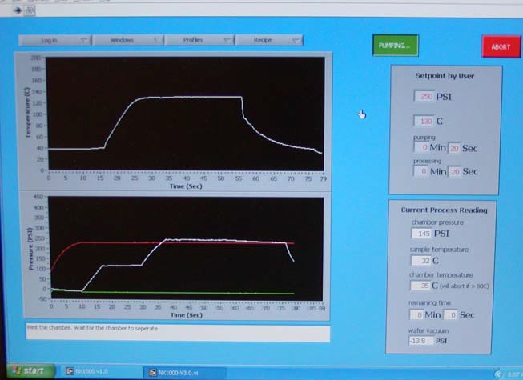
12. When imprinting is finished, the chamber vents and opens automatically. The status indicator at the bottom of the screen shows “To begin a new run”. The operator can open the drawer and remove the sample at this time.
13. To save current process data, click Profiles, select a file path, and click Save.
14. Repeat Step 6 through 11 for the next imprint run.
- Note:
- During imprint, you can click the “skip imprint” button on the right top of the screen to skip current imprint and directly go to cooling of sample.
- At any time, the operator can abort the process by clicking the red “ABORT” button on upper right of the screen. After pressing the “Abort” button in the software, the operator should wait for 1 minute, and then follow the screen instructions to continue.
- An emergency stop may be executed by pressing the RED Emergency button on the small box underneath the monitor. After an emergency stop, the operator must contact the administrator to reset the machine.
3. Shut Down
1. After finishing all imprint runs, click “Login” on the left top of the screen to open a drop-down menu.
2. Choose “Exit” to exit the program.

